Week 1 (September 23rd – September 27)
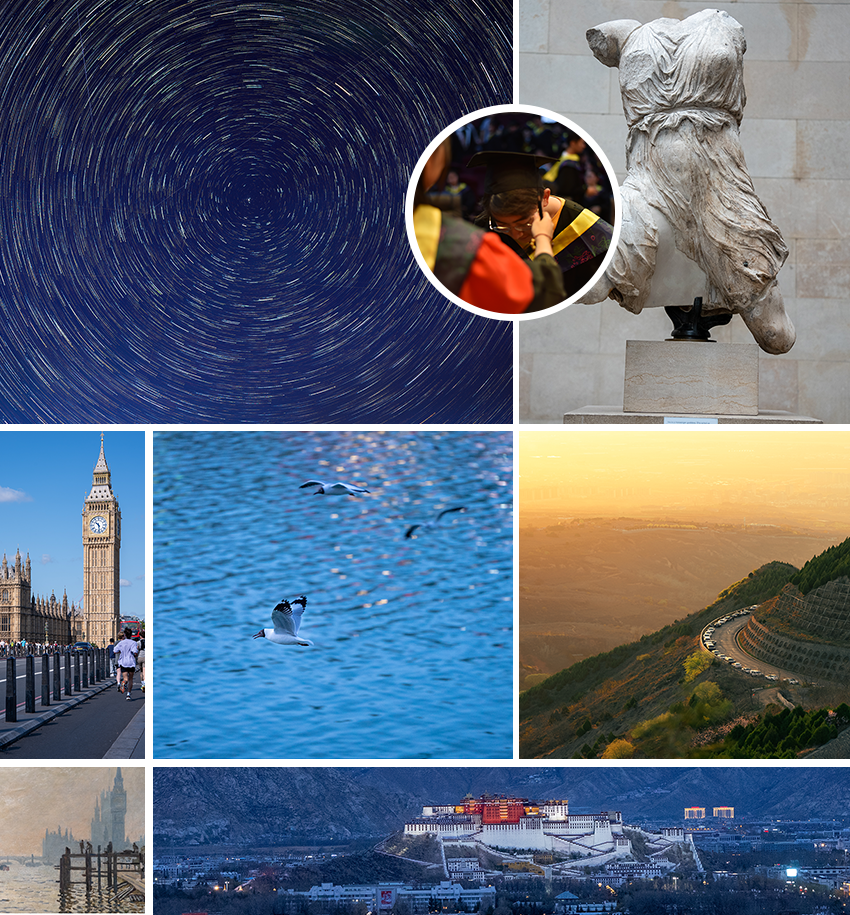
The first picture shows my understanding of time, the star orbit shows the continuity of time, and the moment of graduation has frozen my growth, the stone statue of the broken arm shows the moment of history, Big Ben itself is time, the moment of the photographed birds, the time of the sunset, and the Big Ben in the painting all show the change of time. And the last one is the moment when the lights turn on after dark, which represents time. These pictures are all changed in time, but there is not enough continuity, so I deliberately remade the second one.
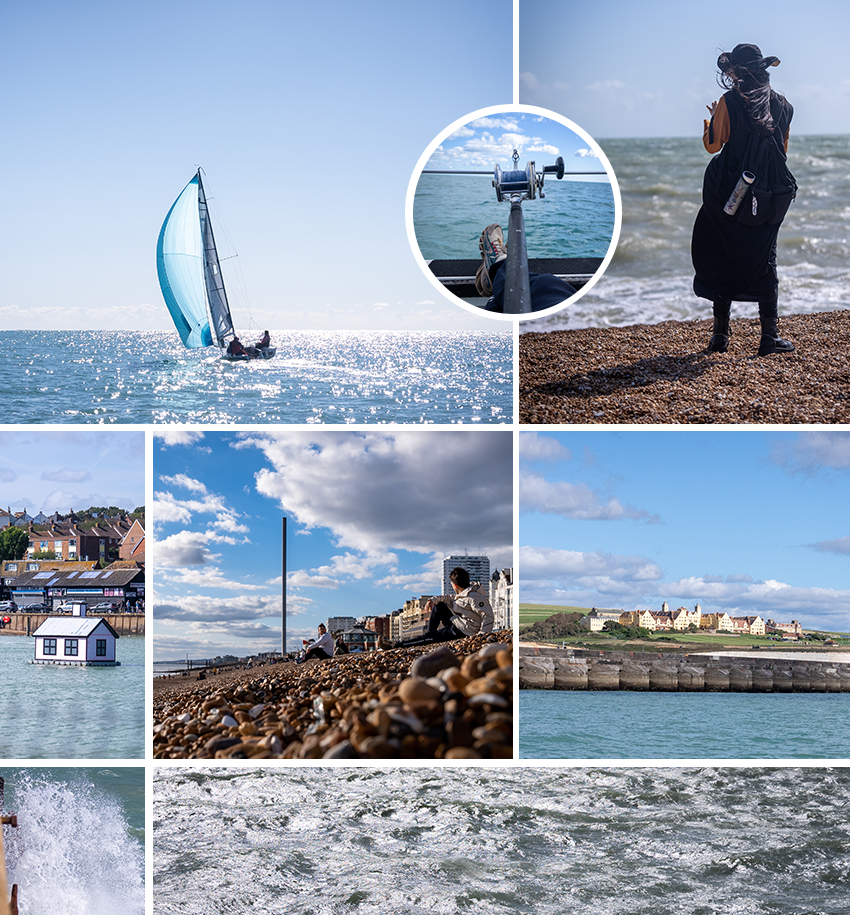
The second picture also shows time, but the difference is that I have strengthened the continuity between the pictures so that the pictures appear to be continuous. This series of pictures shows a series of changes in my time at the beach. Some are instant freeze, some are a long time to wait.
Week 2 (September 30th – October 4th)
This work is made by combining a virtual 3d character on the background of a shot I took in reality. The reason why I made this video or the idea is to show the synthetic effect of nuke. The background is a street scene I shot with my phone, and the 3d model is the footage on the Internet. The whole effect is completed by the software’s built-in plug-in, and my main work is to operate the mirror, shoot, edit and add music.
Week 3 (October 7th – October 11th)
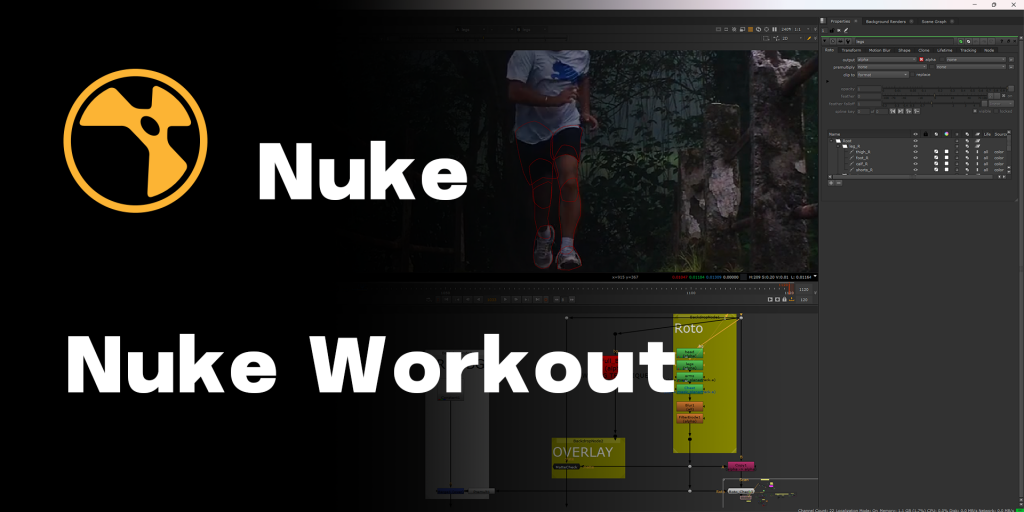
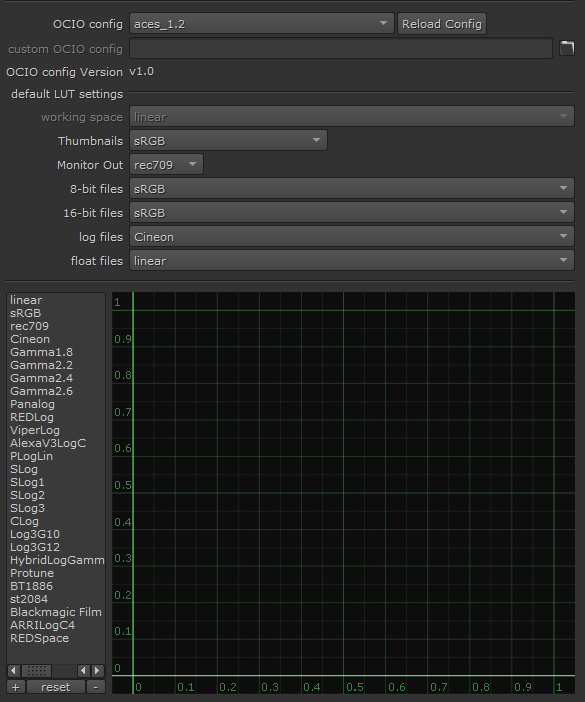
This class introduces the concept of digital synthesis and the Nuke software interface, including reviewing the homework of the previous class, the VFX process and the role of digital compositor, explaining the difference between After Effects, Fusion and Nuke, the basic operation of Nuke, material import and project setup, and focusing on the node system and practical exercises for creating VFX sequences.
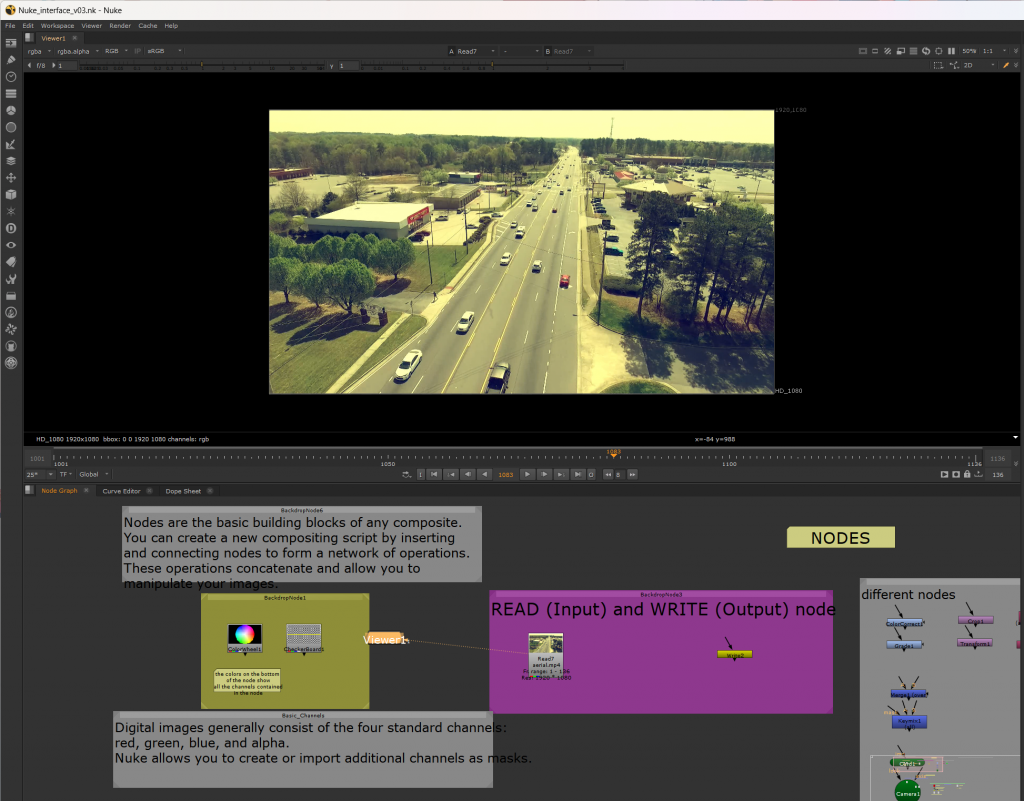
But the fire alarm went off in the middle of the class, and the progress was delayed a little. It was a sad story.
Week 4 (October 14th – October 18th)
Catch up on what we didn’t cover last time.
Week 5 (21 October- 25 October)
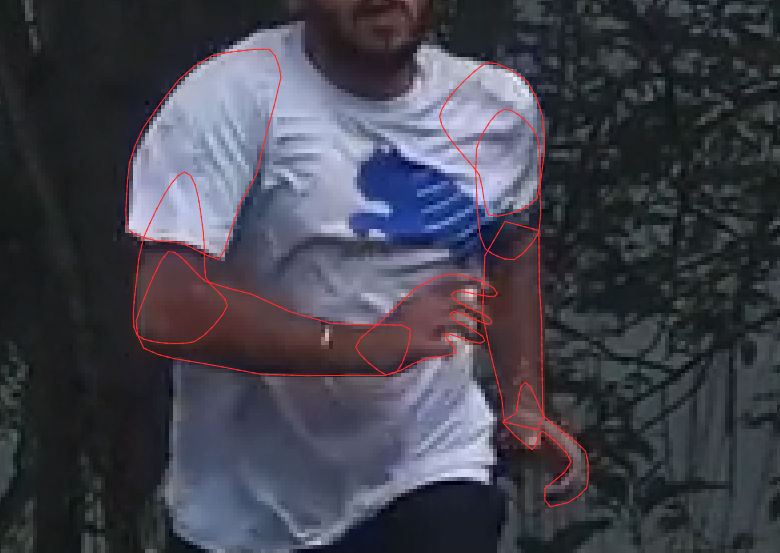
In nuke, in order to capture such irregular shape changes, it is necessary to manually classify and matting the target. Taking the figure this time as an example, people can be roughly divided into four roto nodes, namely, head, body, legs and hands. Then each part is refined, for example, the arm can be divided into big arm, forearm, hand, and so on. Matting each part separately can ensure maximum quality and controllability.In nuke, in order to capture such irregular shape changes, it is necessary to manually classify and matting the target. Taking the figure this time as an example, people can be roughly divided into four roto nodes, namely, head, body, legs and hands. Then each part is refined, for example, the arm can be divided into big arm, forearm, hand, and so on. Matting each part separately can ensure maximum quality and controllability.
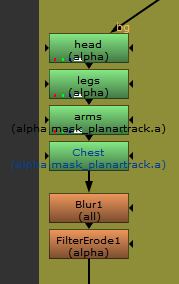

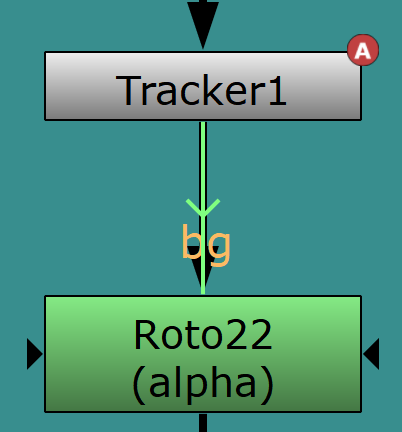
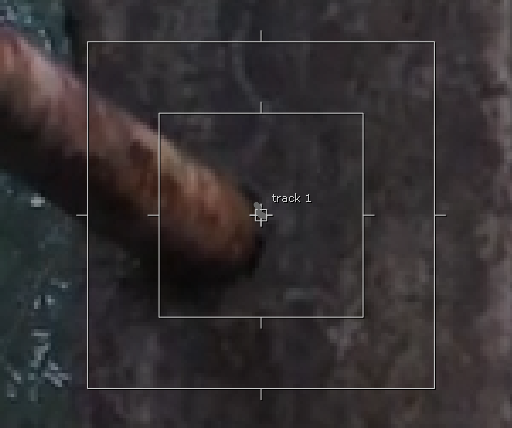
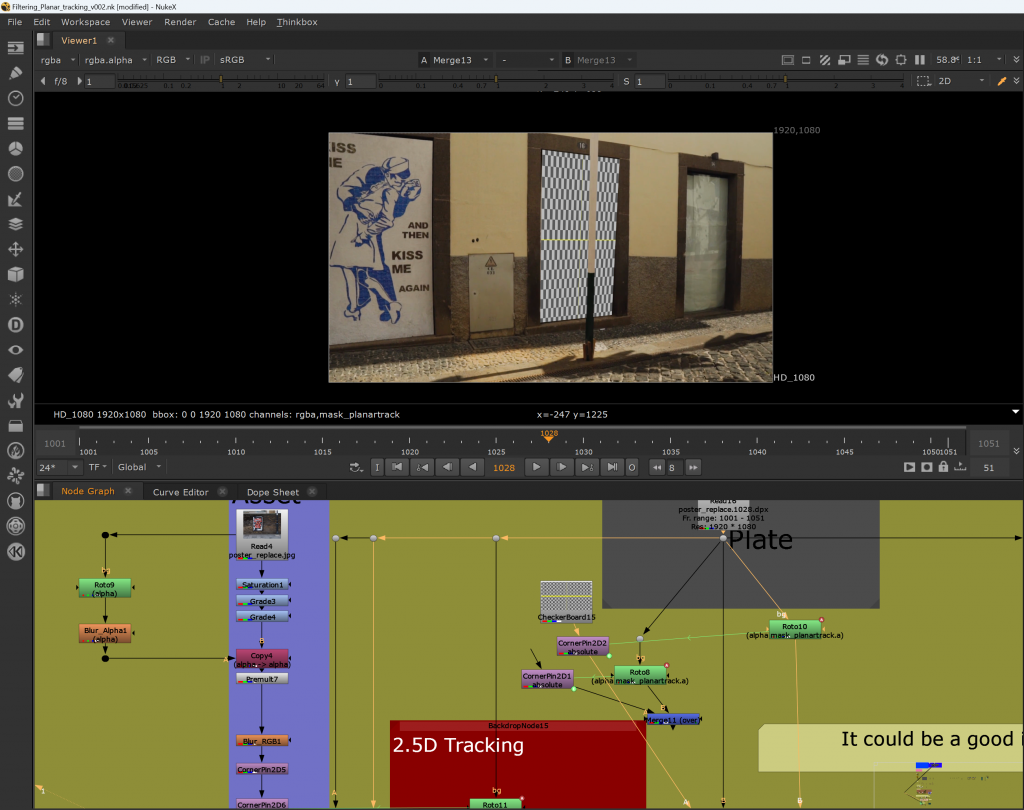
In the matting process, some objects that do not deform according to the rules, such as columns, are suitable for tracking to matting. By linking the tracking node’s displacement data to the roto node, the mask can follow the movement of the object.
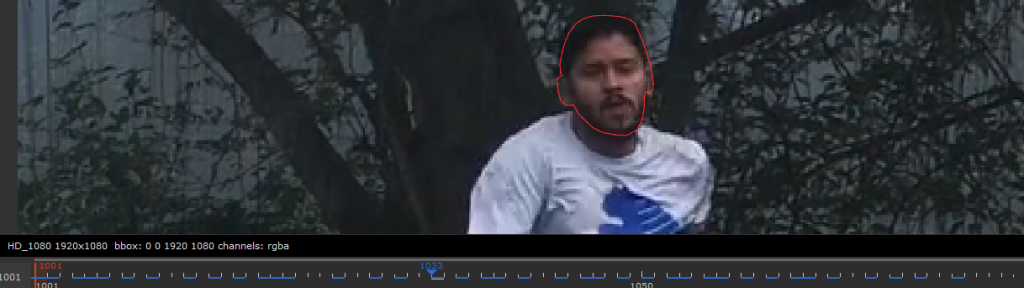
Here is my final matting effect, in order to rush time, in fact, there are many details are not perfect, such as the character’s hair, shoelaces, etc., these are places that can be improved.
Week 6 (28 October – 01 November)
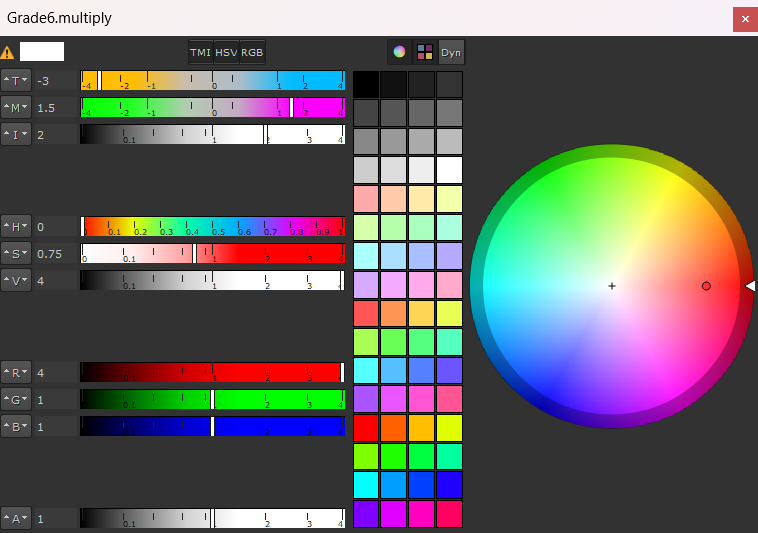
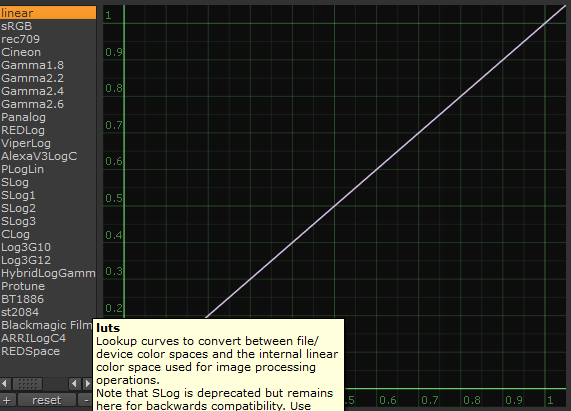
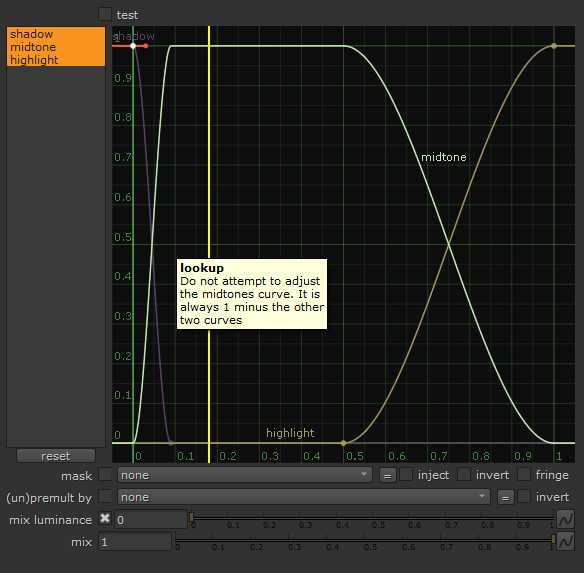
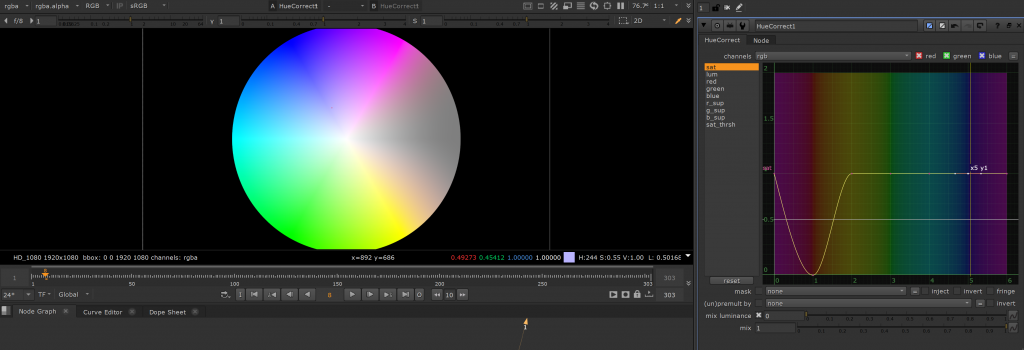
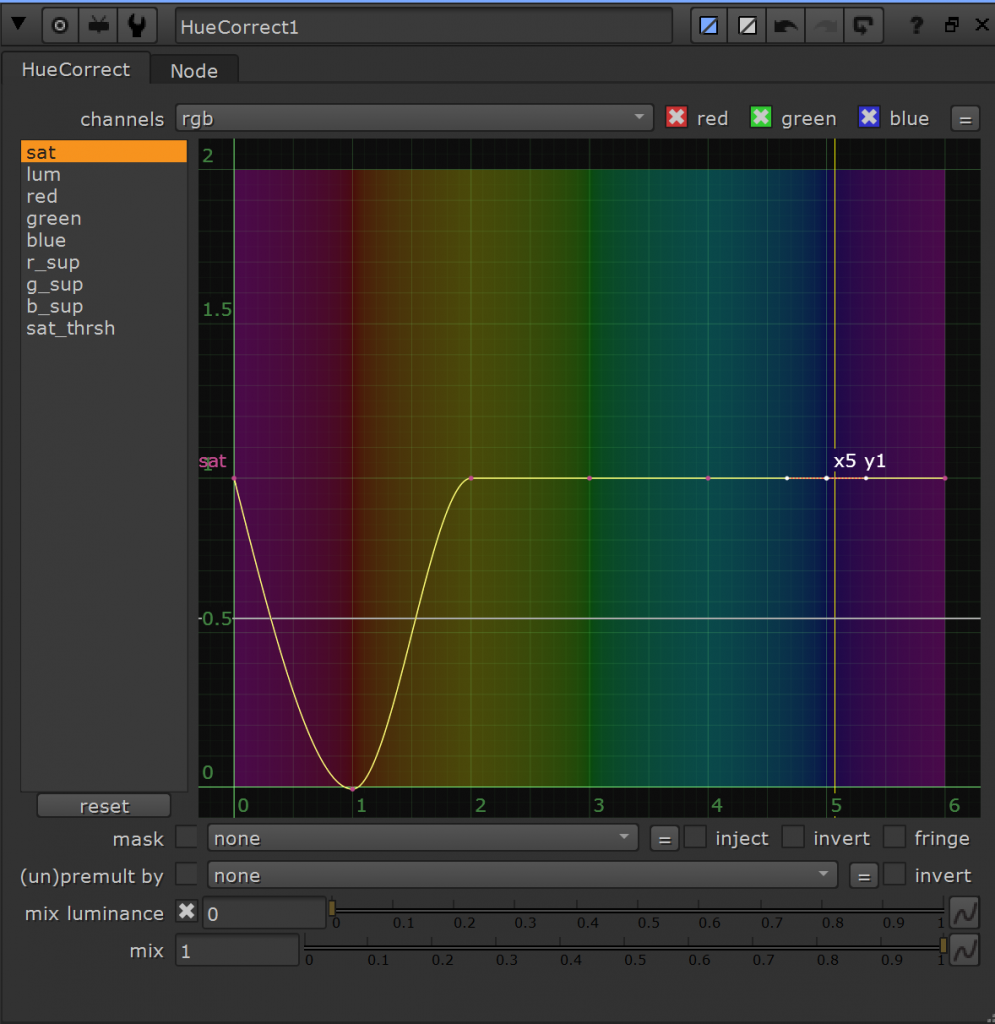
This lecture explains the core techniques of compositing and color matching, including the concept of color space, the use of merging nodes, the application of slope nodes, the correct color matching workflow, QC inspection shots for color correction, and best practices for publishing shots and samples.
Week 7 (04 November -08 November)
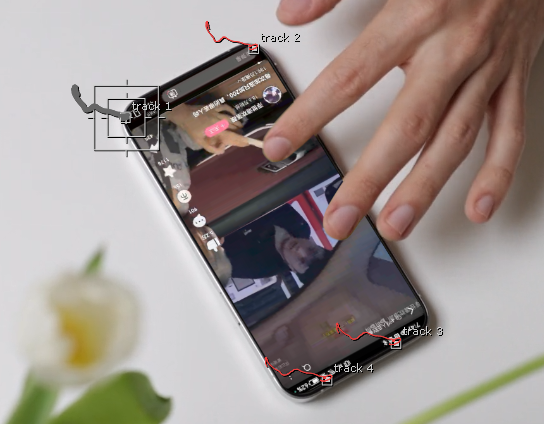
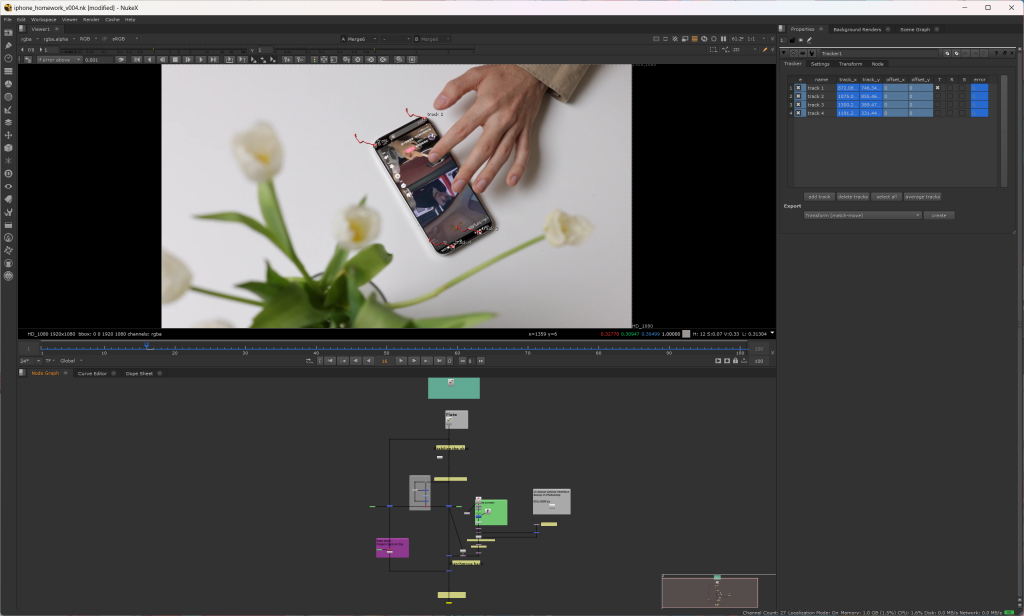
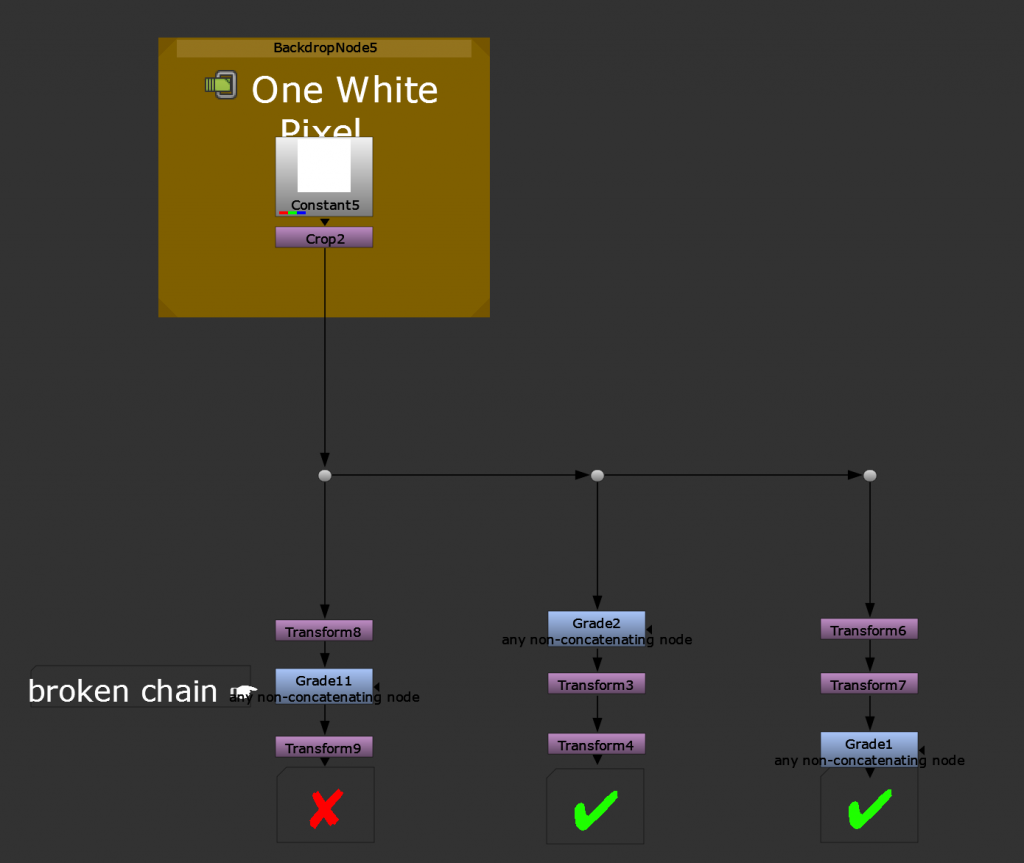
This lecture explained the matching movement and point tracking technology, including filtering and cascading, Transform nodes, 2D point tracking, the correct workflow of matching movement, the use of Corner Pin nodes, and conducted 1 hour practical practice.

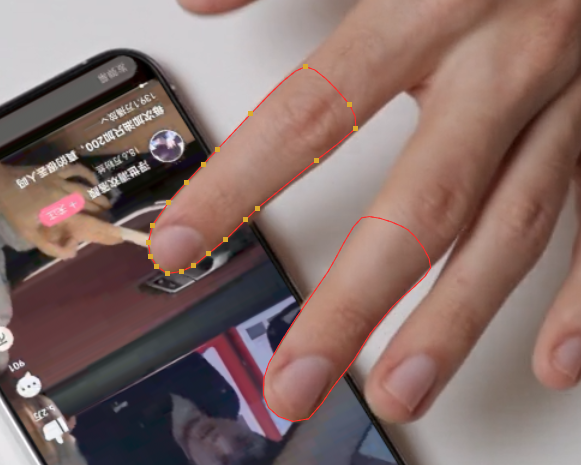
For homework, the task was to button a mobile phone screen. First, I recorded a short video material with my mobile phone, then copied the Alpha channel in the original material and modified the Alpha channel through the roto node to button the original video. Then I used the tracking node to match the motion, and finally I used the roto node to snap my finger out, thus completing the task.

Week 8 (11 November – 15 November)
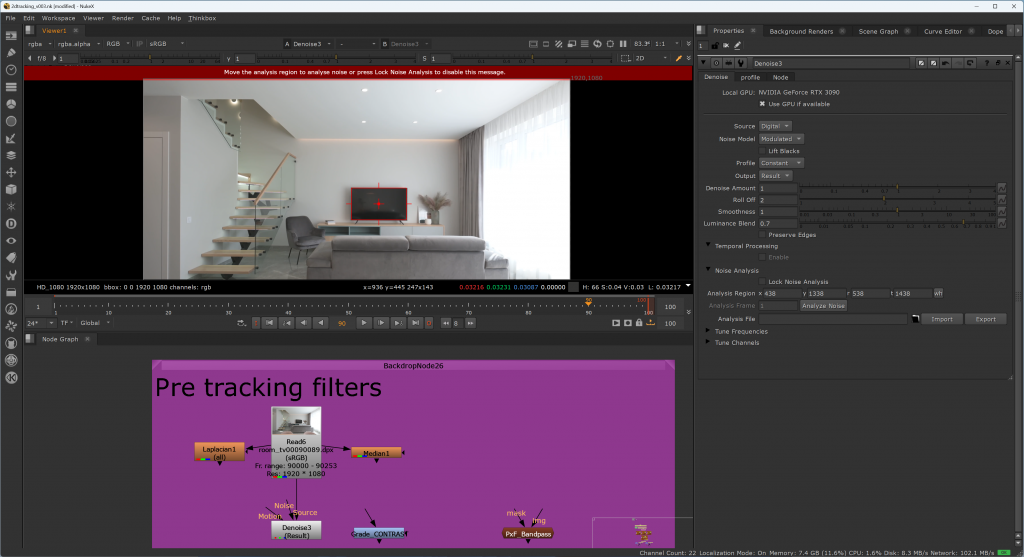
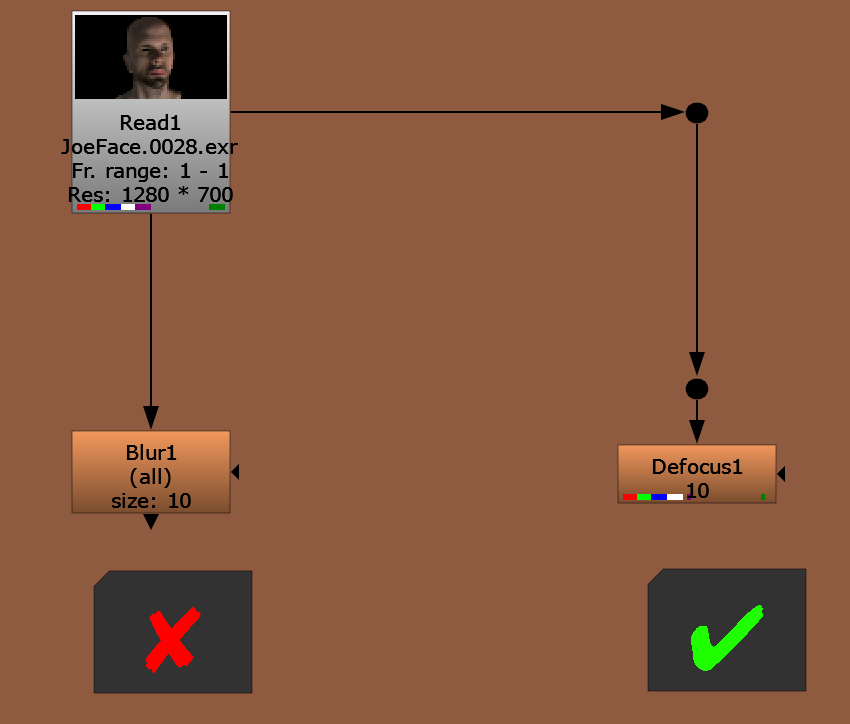
This week’s class explains the concept of channels in Nuke, the proper matching movement workflow, the difference between blurring and defocusing, and basic depth-of-field focusing principles.


Week 9 (18 November -22 November)
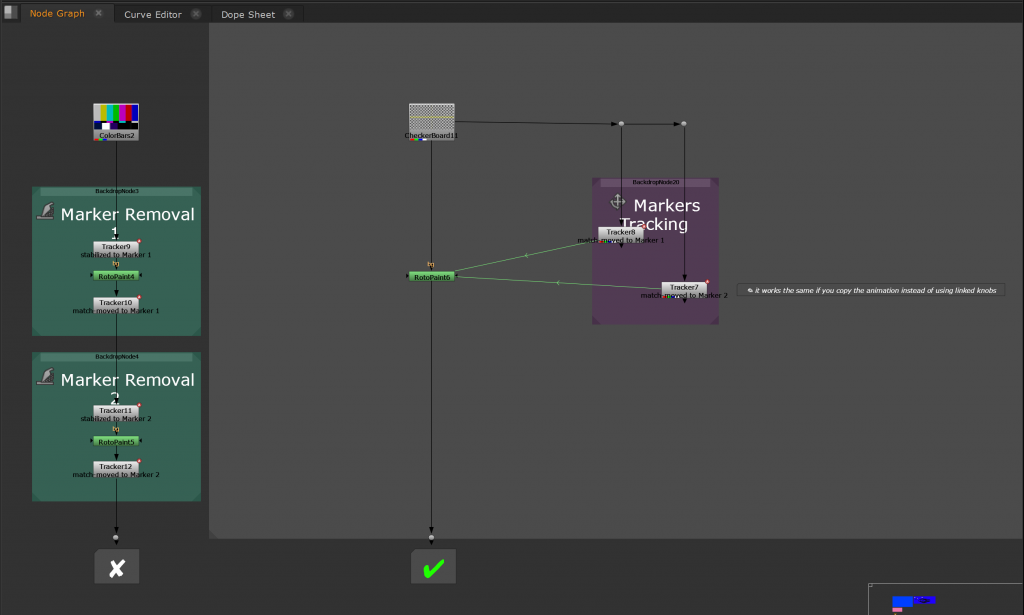
In this lesson, we mainly learned about root drawing nodes, cloning and creating patches through cases and proper 2d cleanup and rig removal workflows.
During the production process, I mainly wanted to create a cyberpunk style with technical color, so I found a lot of creative makeup references and put them together, and finally made my work.
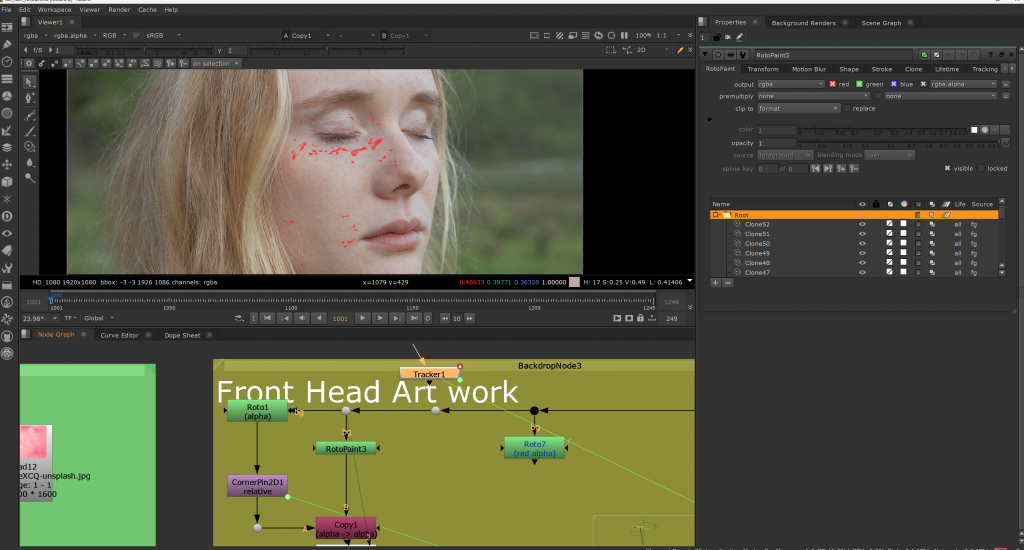
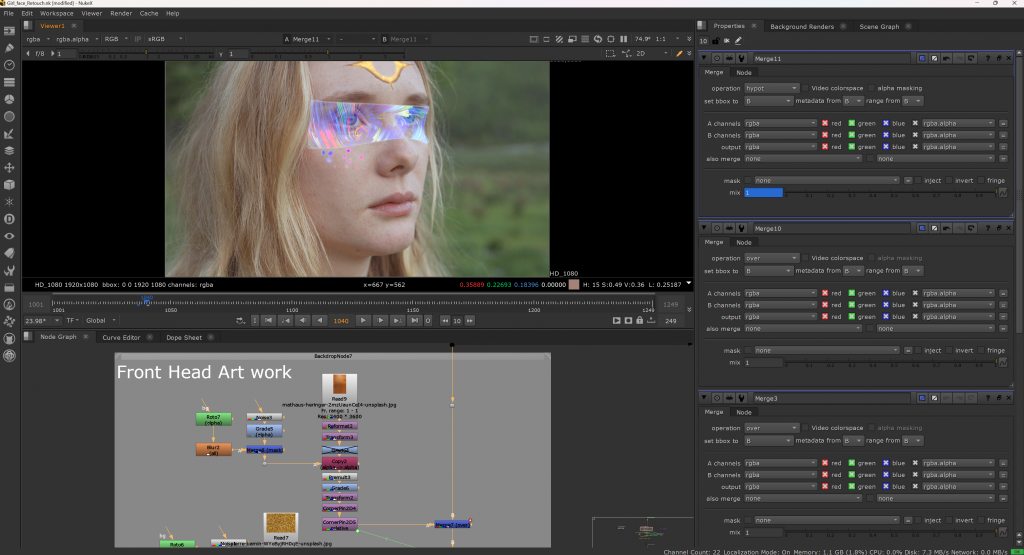
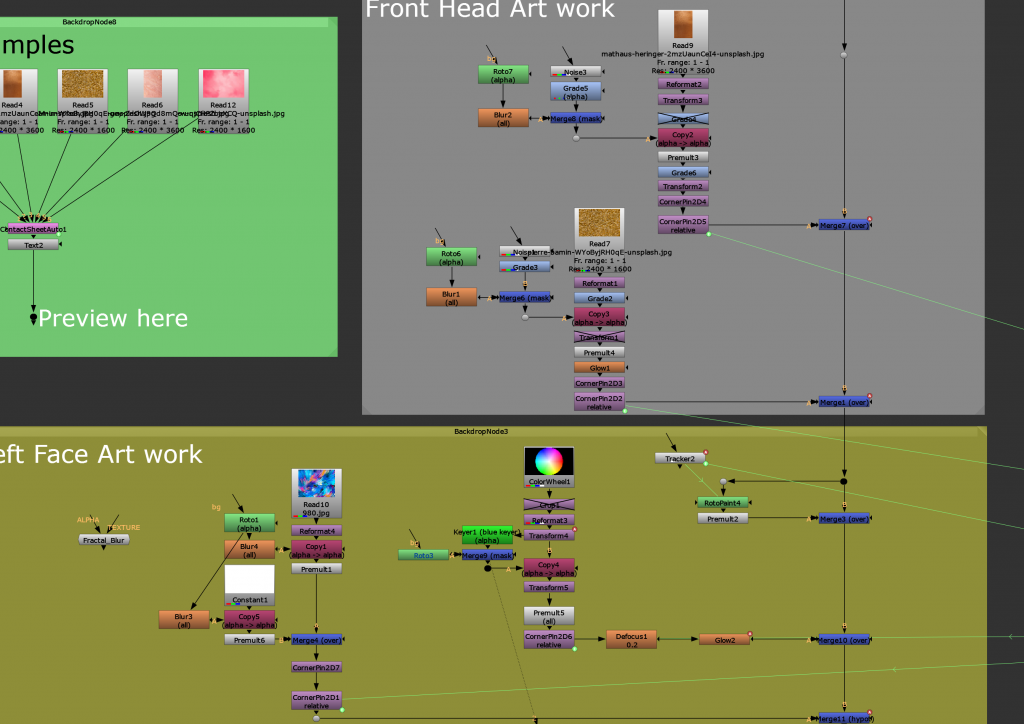
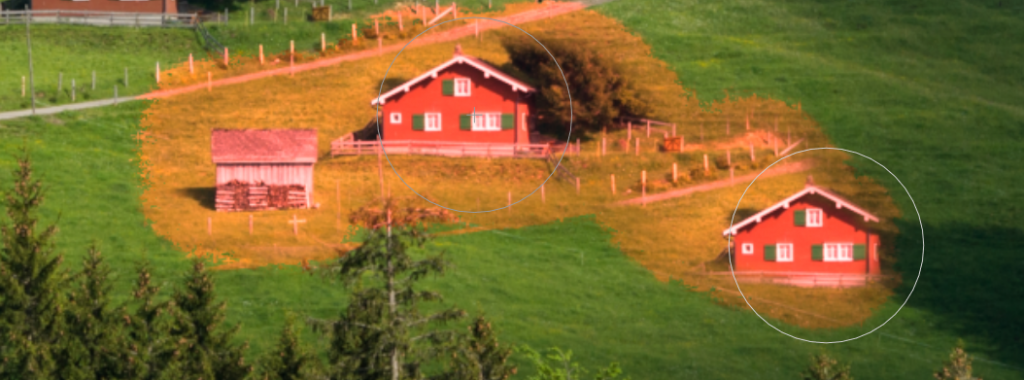
The following is my final work, mainly using a variety of tracking methods and mask technology to achieve the final effect.
Leave a Reply